


Please allow Pop-ups from scalemodelbuildings.co in order to fully utilize our website
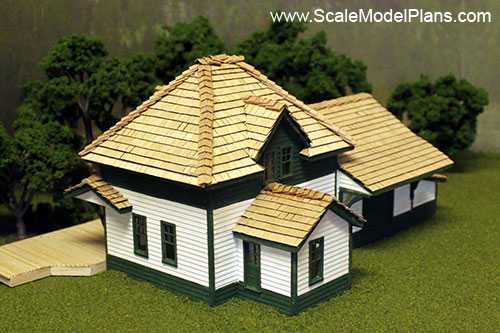
How to Make an HO Scale Shake Roof
Click here for Plan - CNR 3rd Class Depot
Click here for Plan - CNR 3rd Class Depot
There are some very good, realistic looking roofing materials available for scale model structures, but once in a while a project comes along that just cries out for something special. Creating your own realistic looking shakes is not as difficult as you 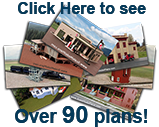 might think, and the results are worth the effort.
"Barn Shakes" were a little thicker, and sometimes wavier version of hand-split shakes, and were often a bit longer - 24" as opposed to 18", so you could get a little more coverage per square.
This tutorial will show you how to make authentic looking HO scale barn shakes.
(Here is a link to a video on making Doll House shingles, which could be adapted to Garden Scale)
- Start off with 0.020", (.5mm) veneer. The species is not critical, as any available wood grain veneer can resemble natural cedar in one stage of aging. Weathering chemicals can be applied to give the finished roof a weathered look.
- A standard paper cutter will slice through the veneer quite easily. Cut the veneer into page-size sheets with the 11" dimension with the grain.
- Next, slice the sheets into random width strips, averaging around 3/32" in width.
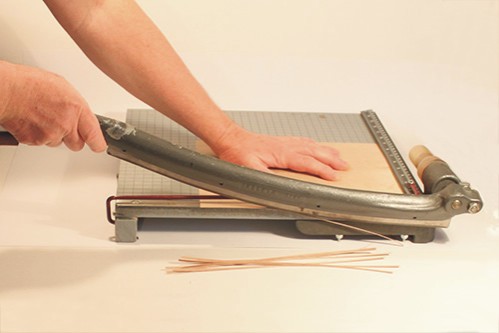
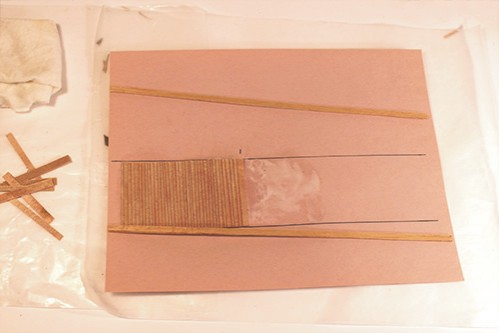
- Lay out a sheet of black construction paper, using a sheet of wax paper underneath to protect the surface of your workspace.
- Spread white glue evenly over the construction paper, working about 3" at a time so the glue doesn't set too soon.
- Lay the strips out side by side, pressing them into the glue.
- Try to maintain a parallel pattern, but don't worry about small gaps between the strips. Small gaps will allow black to show through and enhance the natural appearance of the shakes.
* You don't want the strips to be so tightly together that they visibly blend in with each other. This would defeat the purpose.
- Some of the strips may not be perfectly uniform/parallel. If so, occasionally switch them end for end to balance and correct the rows.
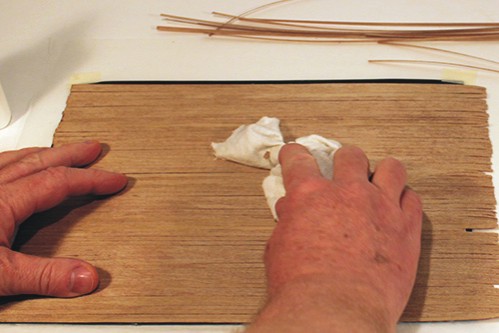
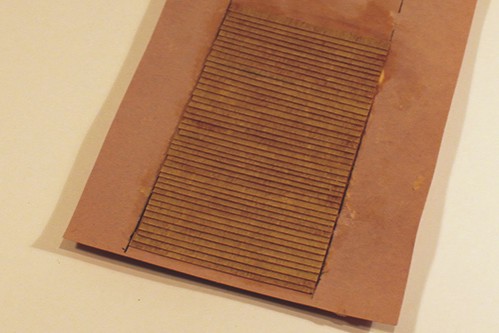
- With a damp/wet rag wipe lengthwise across the finished sheet, apply firm pressure. This will help to wipe off any excess glue, as well as flatten out the strips.
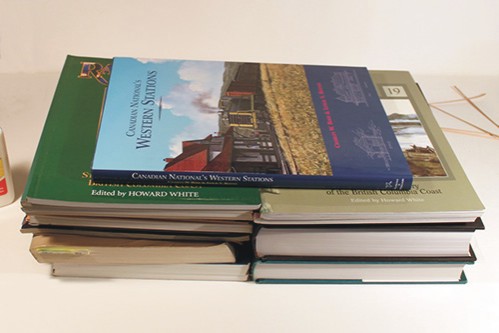
- Lay a sheet of wax paper over top of the shakes and cover with as much weight as necessary. The white glue bond is stronger when clamped together. (Use at least one railroad book!)
- Allow to dry overnight.
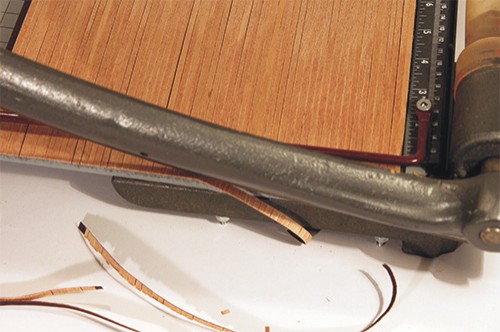
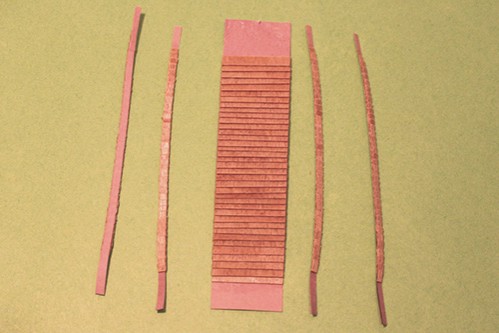
- Once the sheet is thoroughly dry, cut across the grain into uniform width strips approximately 1/4" wide, or 3/16" depending on how much overlap you plan on using.
- 3/32" overlap will represent approx. 8" in HO scale, and would be appropriate for houses. Barns and industrial buildings could get away with a bit more.
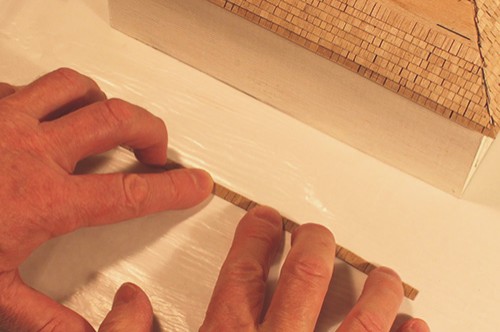
- The strips may have a tendency to curve as the glue dries. To straighten them out, and also to create a small gap between the shakes for appearance, lay them out flat and slightly reverse the curve with even finger pressure across the strip.
- Trim each strip to length, and trim corners if necessary and test fit before applying glue.
- Using white glue or a glue stick, (not the purple school-type), apply glue evenly to the back of the strips and press them into place. (Stainable wood glue is even better).
- Drawing a series of parallel lines on each roof surface will help to maintain even rows. (On 1:1 scale houses roofers sometimes snap chalk-lines). Make any necessary corrections as you get closer to the ridge.
- Use super glue in a few spots to hold things in place
- Continue gluing strips in place. On a hip roof make sure adjacent rows match. You should have the same number of rows on each side.
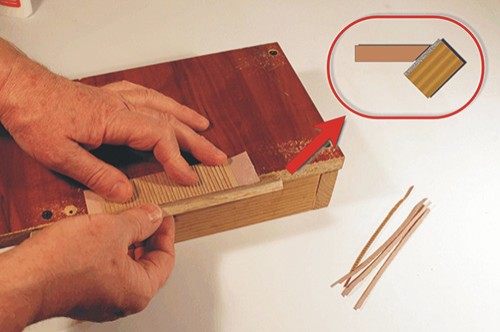
- Before installing the caps run a file board over the roof intersections. File down any high spots that might keep the caps from seating properly.
- You can make a sanding board by gluing sandpaper onto a strip of wood. To allow sanding of inside corners wrap the sandpaper slightly over one edge, and trim flush on the other.
- Gable ends should be sanded to a uniform overhang.
- Spread a little extra super glue to the underside of the eave before sanding to prevent the end shakes from splitting off.
Caps:
- Cut several uniform strips of veneer across the grain.
- Use a natural tone of construction paper. This time, overlap the strips instead of laying them out side by side. Glue the strips to paper, using the same amount of overlap as you did when applying the shake strips to the roof.
- For added strength spread glue to reverse side of each strip.

Visit our News Page for monthly discounts on select plan packages.
Up to 15% off!
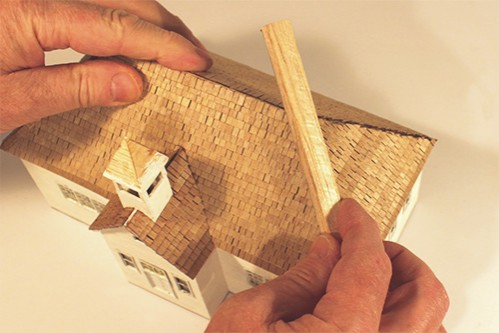
- Prepare a section slightly longer that the longest length of roof cap that you will need.
- Lay wax paper over the sheet and allow to set up for a few hours under a stack of books or other weight.
- Cut strips approximately 3/32" wide as shown. 3/32" scales to approx. 8" in HO, which is on the large side for roof caps, but narrower strips tend to become more difficult to handle.
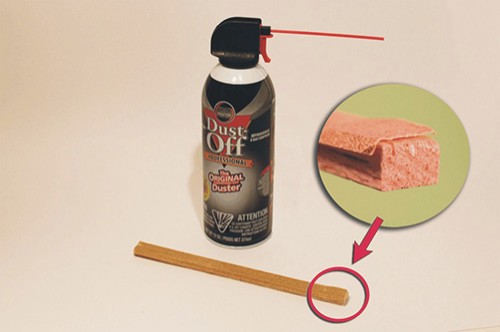
- Before cutting strips from the main piece, sand a beveled edge on each side (see inset).
- Cut a strip off each side so that you end up with two beveled mating surfaces.
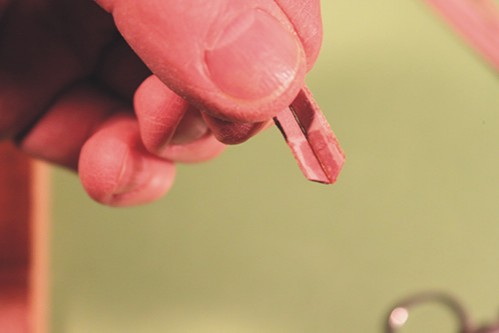
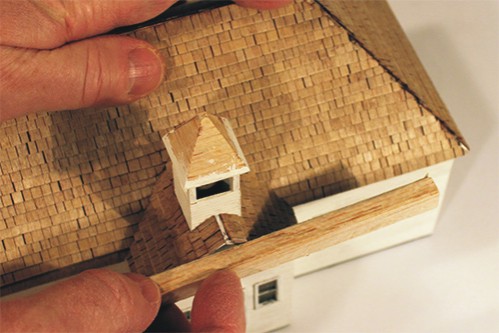
- To make the small pieces easier to handle, fix the two ends of the roof caps together with super glue.
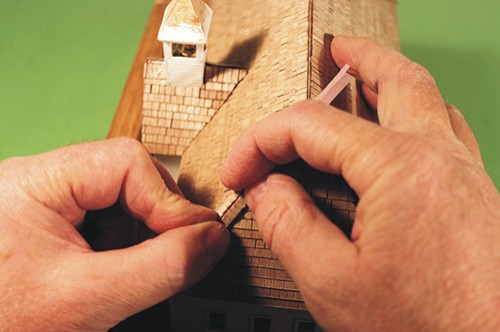
- Set the roof cap in place on the roof to establish the proper angle and fit.
- Glue with super glue every 1/2" or so to maintain the shape.
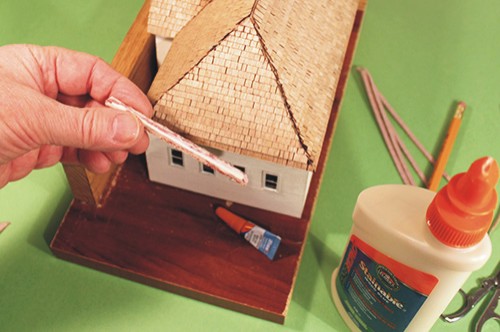
- With the roof cap turned upside down run a bead of glue evenly in the channel, and press and hold in place.
- Use a drop of super glue or masking tape to hold in place while glue sets.
- The last pieces in place are the roof caps. Roof caps typically start at the outside edges and work toward the middle of the roof
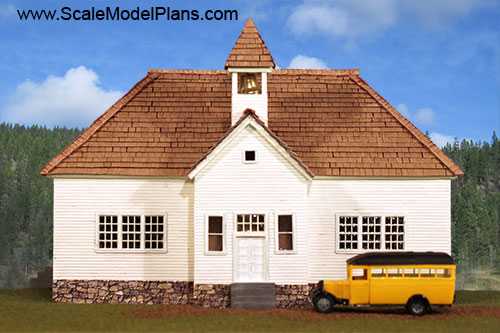
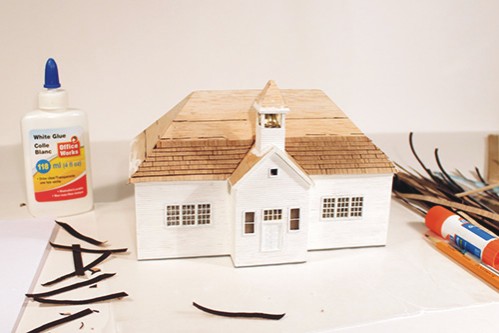
This is the Pettigrew Schoolhouse in Madison County, Arkansas. Once considered the "Hardwood Capital of the World", Pettigrew became another sad railroad casualty story.
View our On-line Catalog
of N Scale and HO Scale plans, templates, and Cardstock patterns, then click to order the printable PDF files so you can get started on your next project.
Disclaimer:
Information provided in these tutorials is for
informational purposes only. Owners of this website offer no
guarantees and assume no responsibility or liability of any type
with respect to the content of these tutorials and will not be
held liable for any damages or injuries caused by using or
misusing the information on this site, and anyone using these
methods does so at his/her own risk. By viewing these articles
you agree that you will not hold, or seek to hold, Owners of
this site responsible or liable with respect to the content of
this site. Processes illustrated on this website should not be
undertaken without a complete understanding and knowledge of the
safe and proper use of all related tools and processes.
Contact Us © 2022 T. Carson Legal